Shoehorns are an invaluable spoon-shaped tool for putting on leather shoes without eroding the structure of the heel of the shoe as well as fraying the edge, and given the expense of a decent pair of leather shoes, a shoehorn is a good investment.
Shoehorns are taken for granted today in plastic, metal and other man-made materials, but the name shoe ‘horn’ gives away its origins, as the earliest shoehorns were skilfully made from cow horn, using the natural grain in the horn to produce its strength. In a corner of England, on the edge of the Lake District, there remains the UK’s last remaining horn works still making shoehorns, skilfully, by hand, using cow horn, adopting the same techniques as the company would have done in the middle of the 18th century when the workshop first opened. The busy workshop has added many other products to its range since then, and has an enviable reputation throughout the world for handcrafting horn items that will last a lifetime, and beyond.
What follows is a brief explanation of the processes involved in the making of a tip end shoehorn by Chris Mason, Factory Manager at Abbeyhorn, the UK’s last remaining horn works and with a reputation by tailors, gentlemen outfitters, bootmakers and haberdashers as the gold standard of shoehorn makers.
Similarities and differences
All our shoehorns will go through the same core processes – where the horn is selected, sawed, heated, moulded, fine cut, disked, sanded, drilled, polished, engraved and checked – but there will be differences depending on style of shoehorn, i.e. if a stag horn handle is applied, if it has a hook end, etc.
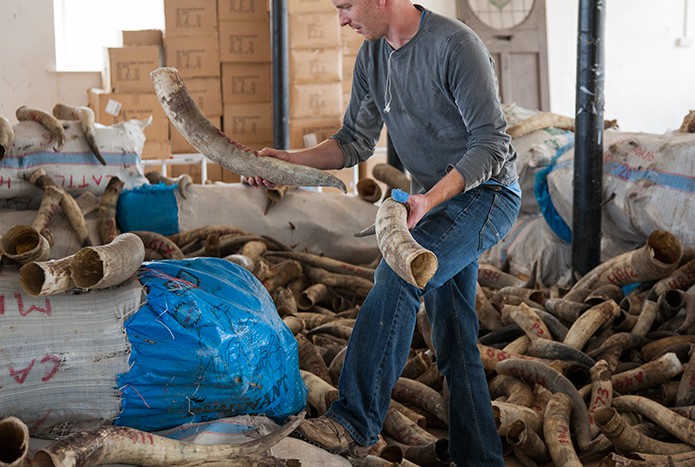
Selecting the horn
Not all horn is suitable for making a shoehorn. A piece of horn is selected in its natural form and checked that it conforms to the dimension requirements of the shoehorn being made (as we make them in different sizes). As shoehorns need to be robust, we’re looking for horns that are slightly heavier than the norm, and ones that are relatively straight. The horn is then checked for any visible defects such as cracks, mothholes or air bubbles (the longer the horn, the higher the chance of this occurring). We also need to check that the tip is solid, as this will form the handle of the shoehorn. In addition to its physical structure, we are looking for a horn that is colourful, to show its natural beauty once polished.
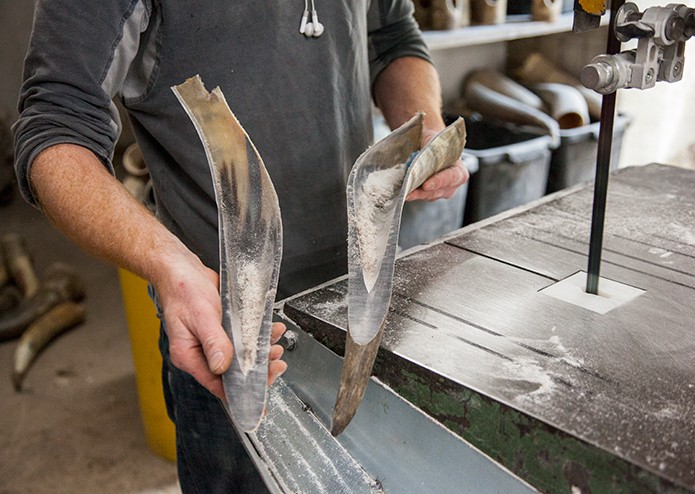
Sawing up
The selected horn is then split into two pieces using a bandsaw skilfully following the curve of the horn and trimming off any excess from the sides. Depending on the length of horn being used, there may be sufficient offcuts to be used within other pieces, such as the end of a pen or whisky cup, the back of a brush, or made into a key ring. There is only ever a small amount of wastage.
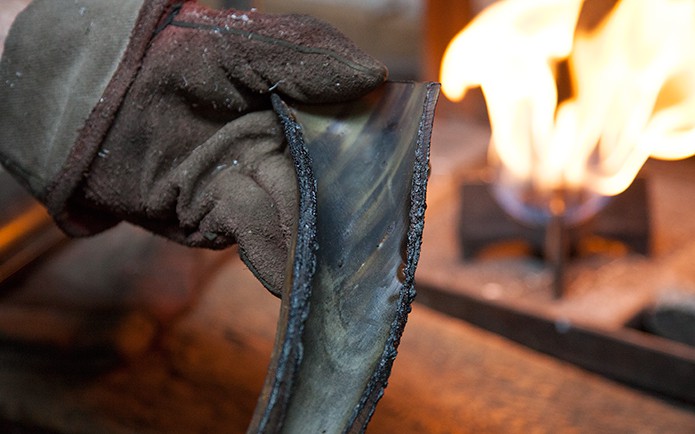
Heating
The horn is treated under a soft gas flame for a few minutes to enable it to be straightened out once moulded. Rather than carried out singularly, we normally do this in batches whereby we would heat half a dozen cut horns above the flames for a few minutes before being exposed to the naked flame. When we pass the horn through the flame, we keep it moving so the horn is heated evenly, concentrating more heat on the thicker parts of the horn.
After a couple of minutes’ exposure to the flame, the horn begins to bubble, with a charring appearing on the surface, but this is quite normal, and will be removed, leaving the horn underneath untouched.
Moulding
The malleable horn is now in a state as soft and pliable as leather and can be shaped, firstly by hand, and then using a metal vice for 5-10 minutes, creating the desired curvature of the shoe horn and straightening the tip.
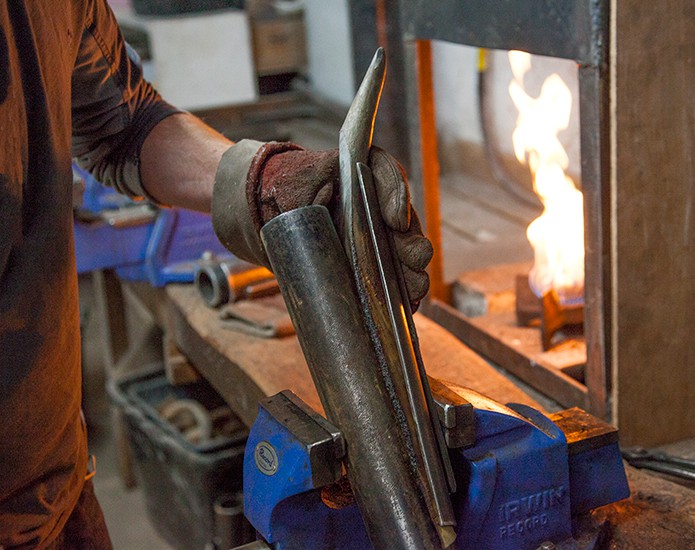
It may take several heat treatments to get the desired shape.
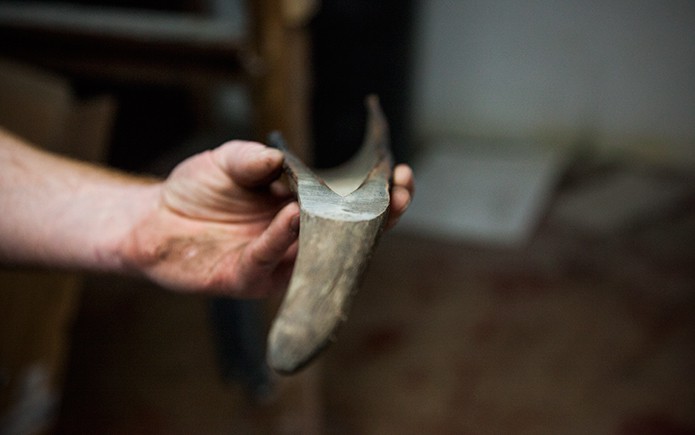
Fine Cutting
The shoehorn is put back through the bandsaw to remove any excess material, such as burnt or bubbled ends.

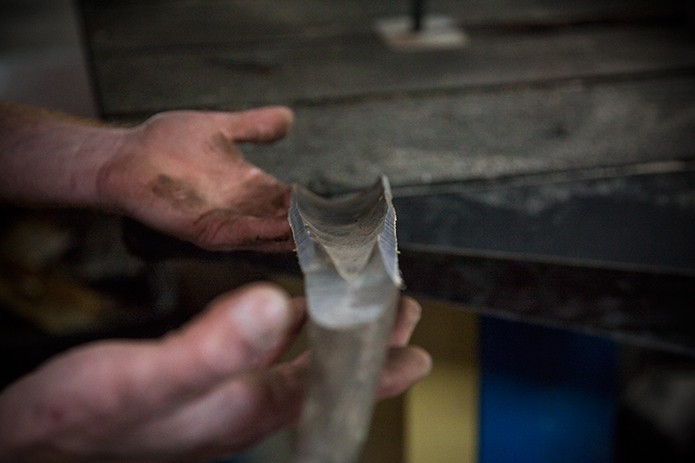
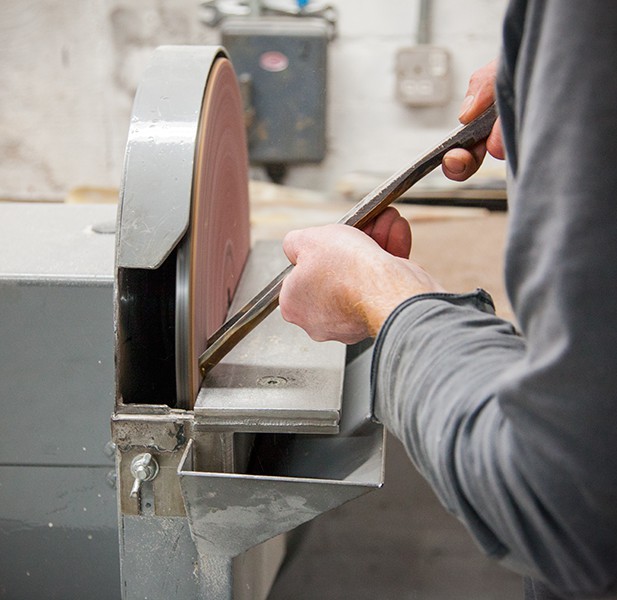
Disking
The shoehorn gets its initial shape by being formed on abrasive disks.
It is measured against a rule depending on which of the standard lengths it will be turned into (from 8 to 24 inches in length, in two-inch increments).

The shoehorn is rounded at the end in which it will enter the heel of the shoe.
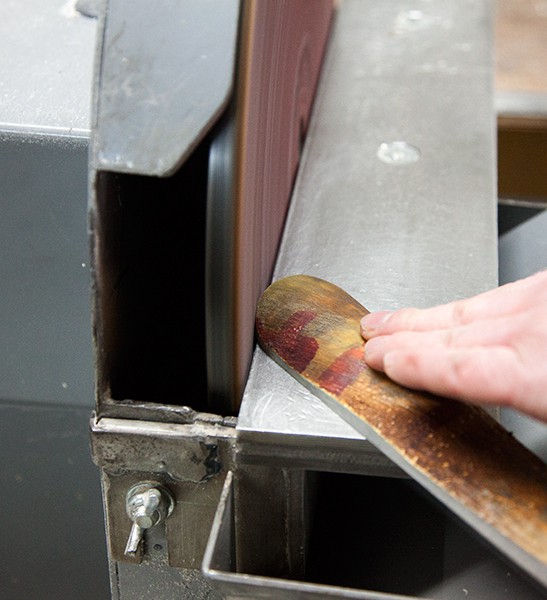
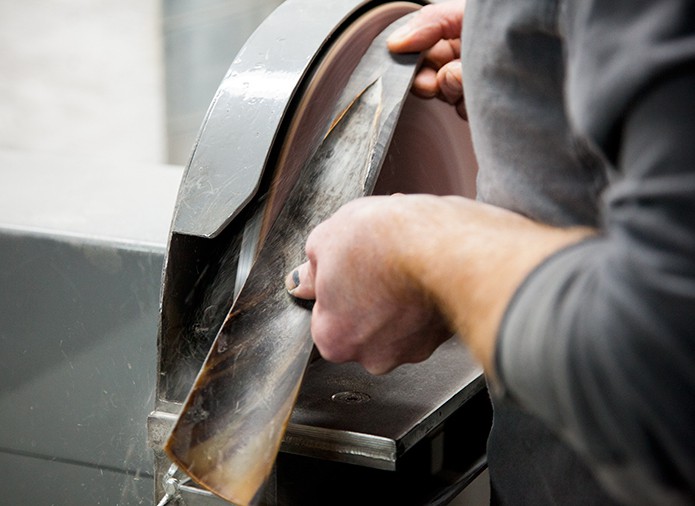
Sanding or “Taping”
The shoehorn is now ready for sanding to its final form.
It is then sanded several times with different levels of abrasive emery cloth, which is effectively sandpaper on a roll. We start with 100 grit coarse sandpaper to take flaws out, then move to 400 grit for a fine finish, carefully ensuring we sand in different directions, including lengthways, to get the desired thickness and rounding off to remove sharp edges. Once all the cracks have been taken out it feels nice and even.
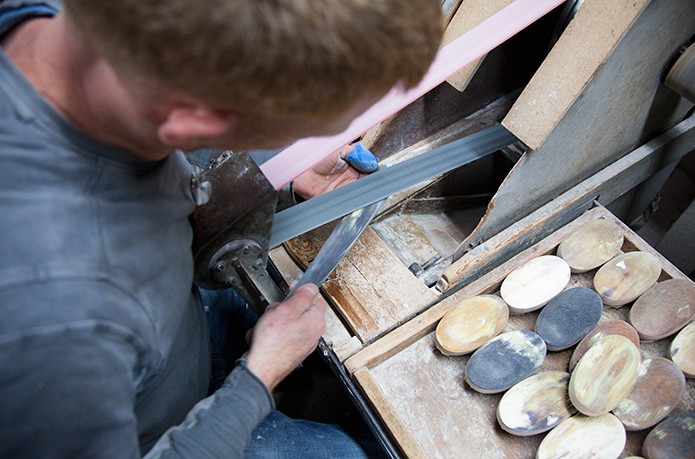
Drilling
Prior to polishing, we drilled a hole in readiness for the leather strap to be inserted to carry the care card.

Holes are countersunk as an aesthetic touch.

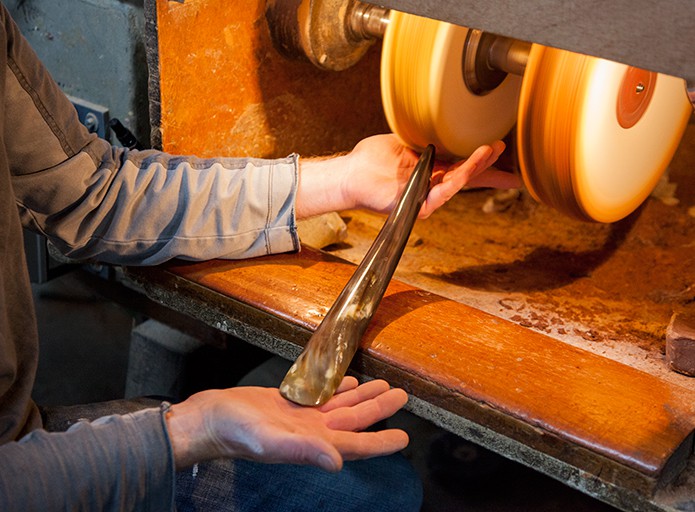
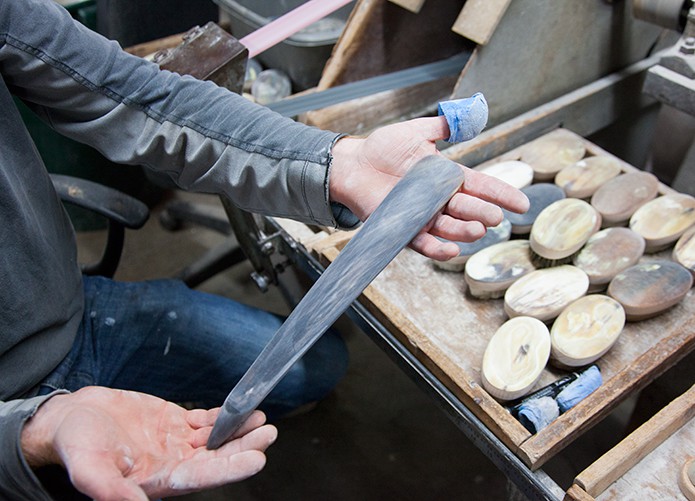
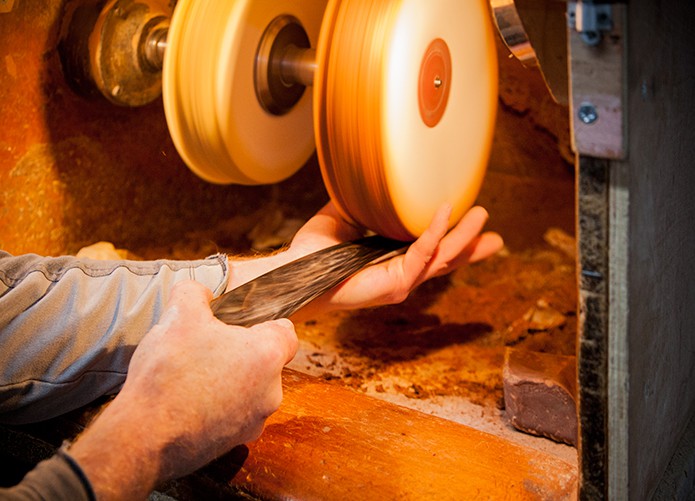
Polishing
Once the shoehorn has been shaped and formed, it is polished to give it a high-gloss finish and bring out the natural beauty and colour of the horn. We use two different buffs – firstly, a brown (rouge) polish and then a white one. We apply a block of polish against the buff to give it its colour, and then start rubbing the shoehorn on the buff. Sometimes it’s only until we reach the polishing stage that slight flaws and imperfections are revealed in the shoehorn, causing us to discard them – we have very stringent quality control criteria.
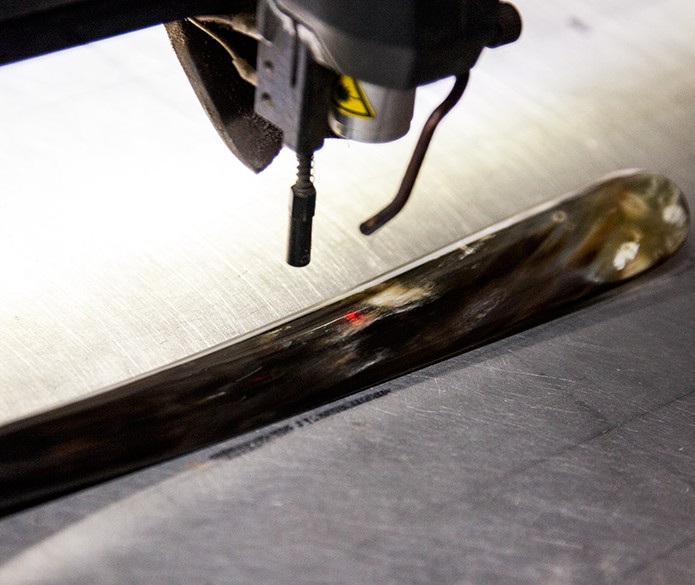
Engraving
The shoehorn is now ready for optional engraving in readiness for the leather strap to be applied and the addition of care card tag.
A final inspection and then the shoehorn is ready for packaging, either to trade buyers or consumers directly via our store.
Thanks to Chris Mason for sharing his insights into making a real horn shoehorn. All images © Merchant & Makers unless otherwise stated. For our interview with Paul Cleasby, owner of Abbeyhorn, exploring the history of 18th Century company and the wider craft of horn-making, click here. Further details on Abbeyhorn below: